A Step-by-Step Workshop

You Can Make This Bag In One Afternoon With A Bucket And A Handful Of Rubber Bands

The pattern comes from how you fold the cloth, not from anything you draw.

(Even if you have never dyed a thing in your life)

A woman carrying a deep indigo tote bag patterned with crisp white nested diamonds

Imagine one quiet afternoon, a plain cotton tote from the craft store, and a bucket of indigo out on the back step. Three hours later you are holding a bag the color of deep denim, with a bright white pattern running clean through it, sharp enough that people will assume it came from a boutique.

Imagine carrying it into the grocery store the following week. Someone in line looks at it, looks again, and asks where you got it. Imagine answering that you made it. On a Saturday. In your own backyard, out of a plain white bag and a bucket of blue.

Imagine finding out where that pattern actually came from. Not a stencil, and not a steady hand. A folded piece of cloth, two offcuts of wood, and some string. Those white lines are simply the places the dye could not reach, and you decided where they would be before the bag was ever wet.

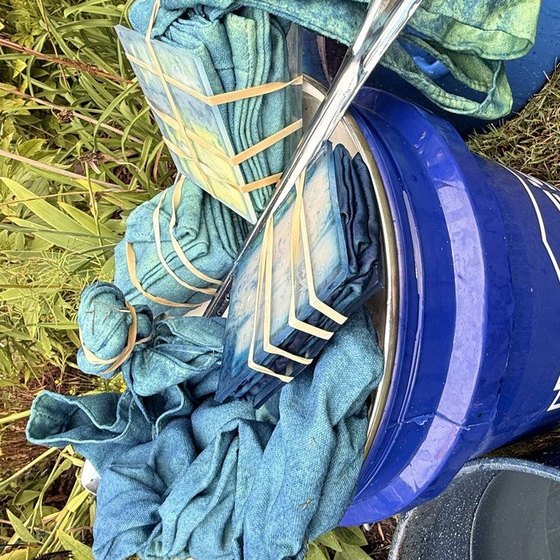
Three white cotton bundles bound three different ways above the three finished indigo swatches each one produced: nested diamonds, diagonal stripes, and scattered starbursts
One Bucket, Three Folds

No Two Bags Come Out The Same

These three totes went into the same vat of indigo on the same afternoon. The only thing that changed was how the cloth was folded before it went in. Fold it flat and clamp it, and you get geometry. Wrap it around a pole, and you get rain. Pinch and bind it, and you get bursts.

Indigo tote bag patterned with a lattice of nested white diamonds

Folded and clamped

Indigo tote bag patterned with fine diagonal white striping

Wrapped on a pole

Indigo tote bag scattered with white starburst rosettes

Pinched and bound

Where The White Lines Actually Come From

The first time you see a shibori (how to pronounce: shee-BOR-ee) bag up close, it does not read as handmade. The blue is too deep and the white is too clean. It looks printed.

Here is why you can make one anyway. You are not putting the pattern onto the bag. You are hiding the parts you want to stay white, and the indigo handles the rest. Wherever cloth is pressed tight against cloth, dye cannot get in, and that untouched cotton is your pattern.

So the skill is not in your hands. It is in the folding, and you have been folding things your whole life.

That flat cotton tote you got free at some conference and shoved in the back of a closet is a perfectly good place to start. It costs you nothing if it goes sideways, and it probably will not.

The small wobble in a hand-fold is the part that makes a bag look made rather than bought. Mine are never quite even. So far nobody but me has ever noticed.

Extreme close-up of indigo-dyed cotton where deep blue meets a cream-white resist line, the dye feathering softly into the weave
This is the edge, up close. The dye creeps a thread or two under the binding and stops. That soft feathering is what separates hand-dyed cloth from a print.
Who Is Teaching This
Nora B., a silver-haired woman in a denim apron, laughing in her kitchen

Nora B.

Hi, I am Nora. I keep the books for a landscaping company two towns over, which is about as far from an art career as a person can get. I mention it early because everybody assumes you have to be artistic to do this. I am not artistic. I am organized, and it turns out that matters far more here.

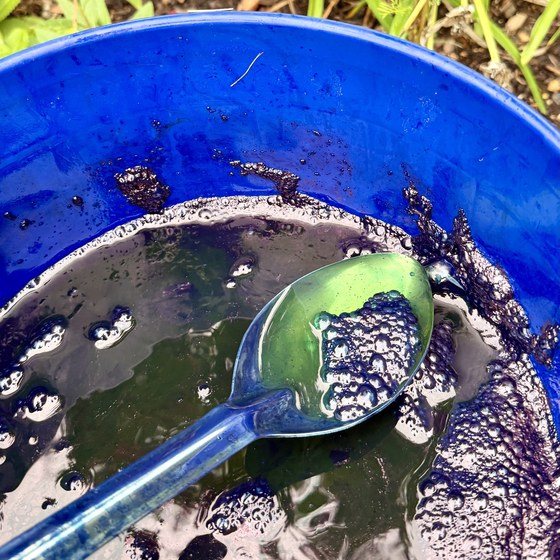
What got me was the color change. You lift a bundle out of the vat and it is yellow-green, and then the air hits it and it goes blue in front of you over about forty seconds. I have been doing this for years and I still stand there and watch it happen every time.

I live in a small house outside Athens, Ohio, with a back step just wide enough for a five-gallon bucket. From May to October most Saturdays that is where you will find me. The clothesline gives me away.

I put this workshop together because the folding is genuinely simple, and almost nobody teaches it in the order that makes it click. If I can get you to that forty seconds where the cloth turns blue, that is all I want.

What You Are Getting

The Shibori Dyeing Workshop

The Shibori Dyeing Workshop shown across a laptop, tablet, and phone alongside two of its printed guides

This is the weekend class I have been running in community centers and my own backyard, filmed from over my shoulder so you see what my hands are doing from the angle you would have if you were folding a tote next to me.

By the end you take one plain cotton tote and dye a full pattern into it, start to finish, in an afternoon. Not a copy of my bag. Yours. You will also know why each step happens when it happens, which is the thing that lets you stop following along and start deciding.

Then it stops being about totes. The same folding, the same vat, the same order of operations gives you napkins, pillow covers, scarves, and table runners. One technique, and everything below came out of it.

An overhead spread of finished indigo pieces on weathered wood: a patterned tote, folded napkins, a draped scarf, a cushion cover, and two spiderweb-patterned cloths
Every piece here came out of the same bucket. The only variable was the fold.
What's Inside

What You'll Learn

Five video modules, in the order the work actually happens.

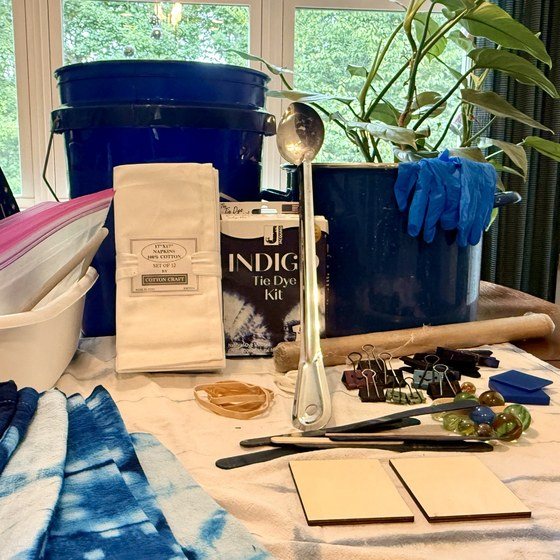
Module 1: indigo powder, twine, rubber bands, wooden blocks and gloves laid out on a sunlit kitchen counter beside a plain cotton tote

Module 1

The Shibori Dyeing Setup

The fifteen-minute setup that turns a cheap bucket of water into a living dye that puts deep, even blue into everything you lower into it.

  • Cotton drinks indigo and poly-blends spit it back out. There is a five-second check you can run in the store aisle, before you buy anything.
  • Almost everyone skips the ten-minute prep wash, and skipping it leaves pale blotches you will not spot until the tote is bone dry.
  • Four things already in your kitchen drawer are shibori tools. Two things beginners spend money on do nothing at all.
  • How to tell a vat that is ready from a vat that is still working. Dip early and the tote comes out grey instead of blue, and you will not find out for two hours.
Module 2: overhead view of hands binding a folded cotton tote between wooden slats with natural twine

Module 2

Fold Like a Master

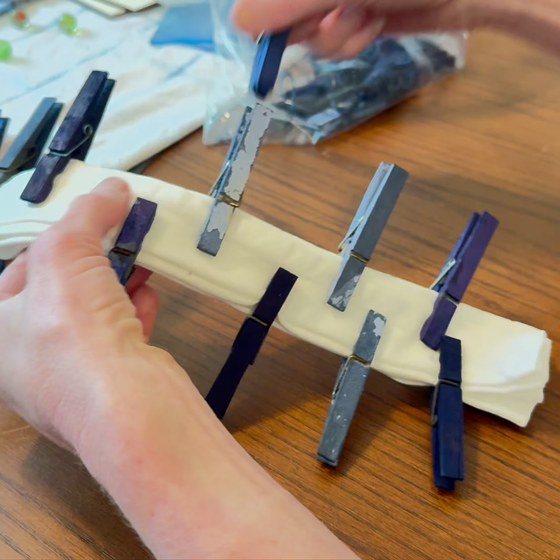
The pattern is not drawn on. It is the part you hide from the dye. This is the folding and the binding, and it is easier than wrapping a birthday present.

  • Why the tightest fold in the room makes the cleanest white line, and the tension that separates crisp geometry from a grey smear.
  • Three beginner-proof folds, fold-and-clamp, tie, and bind, cover nearly every design people stop you to ask about.
  • Divide any tote into an even grid in about a minute using rubber bands, with no ruler and no measuring.
  • Test whether a fold is bound tightly enough before it goes anywhere near the dye, so you never unwrap a bag and find the white bled shut.
Module 3: a grid notebook with a fold diagram sketched in pencil, next to a bound cotton bundle ready for the vat

Module 3

Planning in Reverse

The one mental flip that separates a grey, blotchy tote from something people ask you about on the street. This is the module the free videos leave out.

  • Every fold you make protects a color rather than adding one, and that reversal is the craft in a sentence.
  • The single biggest decision on the whole tote gets made before the indigo ever touches the cloth.
  • Deep blue does not come from soaking longer. Here is the counterintuitive move that actually builds a rich, even indigo.
  • Put a few folds in order in your head and you can look at a blank tote and already see the finished pattern. That is the point where you stop copying videos.
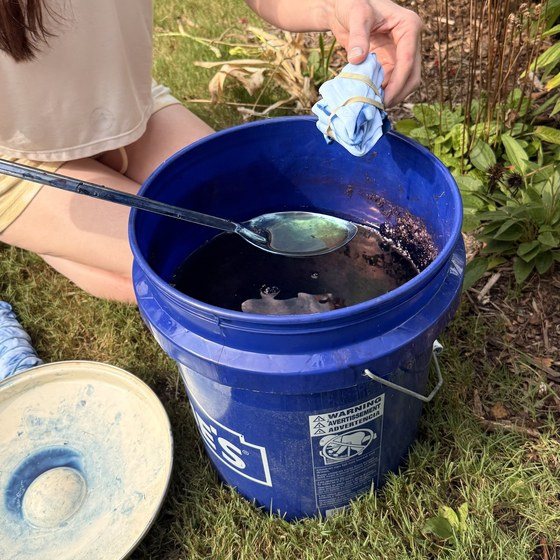
Module 4: gloved hands lifting a bound bundle from a bucket of indigo in a garden, the cloth still yellow-green and turning blue at the edges

Module 4

The Vat

Ten quiet minutes at the bucket where most totes are quietly ruined, and the person holding them will not find out for another two hours.

  • Your tote comes out of the vat green and turns blue in the open air. What it means on the rare occasion that it does not.
  • One thing you must never do at the surface of the vat. Do it once and the bucket is finished, and every tote after it comes out weak and patchy.
  • How many dips it really takes to reach deep denim blue, and the long, boring pause between each one that does all the actual work.
  • Sediment sits at the bottom of the bucket and turns clean blue to dull grey the moment you touch it. Staying clear of it is simple once you know it is there.
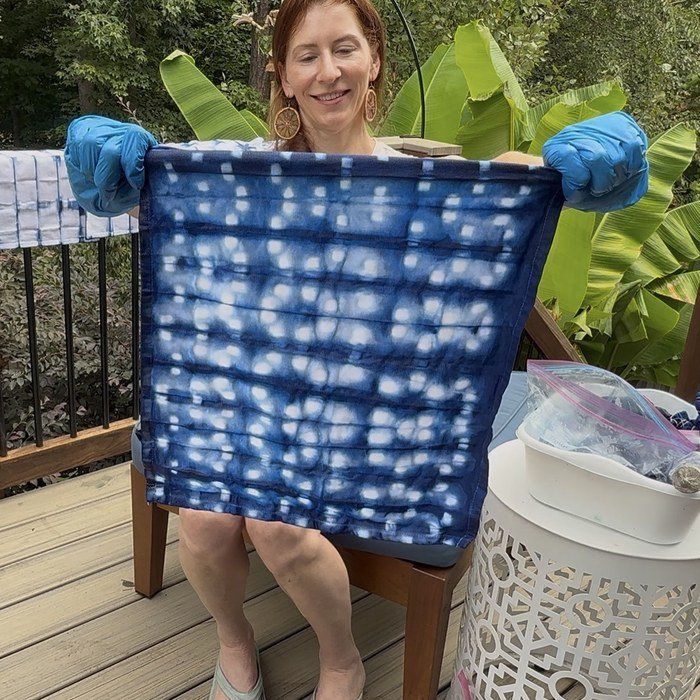
Module 5: gloved hands holding up a finished indigo tote patterned with concentric white rings

Module 5

Your Shibori Reveal

The two minutes everything else was for. The bindings come off, the pattern appears, and this is the part everybody films.

  • Unwrap a still-wet tote the right way and the pattern snaps into focus instead of bleeding at the edges.
  • Why the middle of a fold can still be patchy when everything else looks finished, and the ninety-second fix to do before you rinse.
  • The wash-and-set step decides whether your tote holds its indigo for years or goes grey after three trips through the laundry. Skip it and no amount of care later brings the color back.
  • A final rinse clears the raw-indigo smell along with the loose dye, so the bag is ready to carry the very next morning.
Included Free

4 Free Bonuses (Included Today)

Free Bonus Bonus 1: The Forever-Blue Care Ritual shown on a tablet held in two hands

$19 Value. Yours FREE

The Forever-Blue Care Ritual

Your pieces are only as good as the day they fade. This short guide covers how to wash, set, and care for indigo so your blues hold their depth for years instead of weeks.

  • One wash mistake quietly cuts your indigo in half. Do this instead and a scarf stays deep and vivid load after load.
  • How to set the dye so a finished piece survives the washing machine without bleeding onto everything else in there with it.
  • A kitchen-cupboard rinse seals indigo into the fibers, and you almost certainly own it already.
Free Bonus Bonus 2: The Fold Library shown on a tablet, pairing fold diagrams with the indigo patterns they produce

$29 Value. Yours FREE

The Fold Library

Every fold makes a different pattern. Once you can see which fold makes which, you stop guessing and start designing. This is the map from fold to finished tote, laid out flat.

  • The fold behind every pattern you have ever saved a photo of, drawn out step by step.
  • Look at a shibori pattern you love and reverse-engineer the fold that made it, in about a minute.
  • Three folds look advanced and take two extra minutes. One looks simple and is quietly the hardest thing in the book.
Free Bonus Bonus 3: The Pattern Vault shown on a tablet, a grid of sixteen traditional indigo shibori patterns

$29 Value. Yours FREE

The Pattern Vault: 40 Traditional Shibori Folds, Mapped Flat and Ready to Wrap

Forty traditional shibori patterns drawn out flat, fold by fold, with the binding shown right there on the sheet. Follow the map, fold your tote, dip it. You will not run out of patterns for a very long time.

  • If you can fold a piece of paper around a tote, you can make a pattern people spend years learning to fold by hand.
  • Never again stand over a blank white tote with no idea what to put on it.
  • Forty complete patterns, each with its fold and binding mapped on the sheet, so you are planning in reverse better than most people who have been dyeing for a decade.
Free Bonus Bonus 4: The 12-Color Natural Dye Expansion shown on a tablet, a grid of twelve plant-dyed fabric swatches in pinks, rusts, golds and greens

$29 Value. Yours FREE

The 12-Color Natural Dye Expansion

This is the one I am most excited about. Once blue makes sense, this opens up a whole spectrum of natural color pulled from ordinary kitchen scraps and backyard plants, so your palette is never limited to indigo again. It sounds like a second course, and it very nearly is.

  • Avocado pits give you a soft blush pink and onion skins give you a burnt gold. Here is how to turn the scraps already in your bin into a full range of natural dye.
  • Build a palette richer and stranger than anything on the craft-store shelf, for close to nothing.
  • Natural dyes have a reputation for coming out dull and beige. These are the everyday plants that give you jewel-bright pinks, glowing golds, and deep forest greens instead.

For Just $47 You Get Everything

So what does it cost to learn a craft that turns ten-dollar cloth into pieces people assume came from a boutique? The full price of The Shibori Dyeing Workshop is $97, and for a skill you keep for life that would be fair. It is not what you are going to pay today, and here is the reason.

Right now this page is a beta test. I am not sure I can personally answer questions and look at photos for more than 100 new students at a time, and I refuse to let anyone get stuck and quietly give up. So instead of $97 I am opening it at a fraction of that, purely to find out whether I can handle the first hundred people properly and give every one of them real attention.

If it works, the price goes back to $97 where it belongs. If it does not, I take the page down. Which is why, for you, right now, it is $47.

Three folded indigo shibori pieces stacked and tied with jute twine on a wooden console table, ready to give as a gift The Shibori Dyeing Workshop and its guides shown across laptop, tablet, and phone
  • The Complete Shibori Dyeing Workshop $97 value
  • Bonus: The Forever-Blue Care Ritual $19 value, FREE
  • Bonus: The Fold Library $29 value, FREE
  • Bonus: The Pattern Vault $29 value, FREE
  • Bonus: The 12-Color Natural Dye Expansion $29 value, FREE
Total Value: $203
You Pay: $47

One-Time Purchase. Lifetime Access.

$97 $47
Dye Your First Indigo Tote Now

Locks in the beta price while the first hundred places are open.

Secure Checkout All Cards Accepted 30-Day Money Back

Three Things People Say Before They Start

"But I'm not artistic." Neither is folding a piece of paper, and that is the whole of it. You never draw anything at any point. You wrap a band around the tote, make a few folds, and the traditional patterns fall out of the grid you just built.

"I'll ruin the bag." You will ruin one or two, and that is the good news. Blank totes run a couple of dollars and one kit dyes a whole stack of them, so an early mistake costs about what a coffee does. Module 2 covers the fold-and-dip that gets nearly every first tote through the vat clean.

"Isn't this just tie-dye?" Tie-dye is loud and random. Shibori is quiet and deliberate: one deep color, clean white geometry, the sort of bag somebody reaches for every day for years. Nobody has ever picked up a good indigo tote and thought about summer camp.

30-DAY GUARANTEE

30-Day Money Back Guarantee

You do not have to make the final call today. Take the whole workshop now, set up a vat, fold a couple of practice cloths, and see what comes out of the bucket with your own eyes. If it turns out this is not for you, send one email any time in the next 30 days and the money is back in your account within 24 hours. We will not ask what happened, and there is no form to fill out. Try it, and let the first thing you pull out of the vat make the decision for you.

Frequently Asked Questions

It will, and you are the person this was built for. Shibori patterns are made by folding and binding rather than by drawing or painting, so the cloth does the design work for you. If you can fold paper and wrap a rubber band, you can produce pieces that look professionally made. Most people who come to my weekend classes open with some version of "I'm not creative," and then surprise themselves on the first bag.

None. The workshop assumes you have never dyed anything and starts at the first step, setting up a vat on cheap practice cloth well before you touch a piece you care about. Complete beginners are the point.

Starting from nothing, budget roughly $35 to $50 for your first batch. That covers an indigo kit at around $20 to $30, a five-gallon bucket, rubber bands and string, a couple of wooden blocks or clamps, and a pair of rubber gloves. Blank cotton totes are a few dollars each. After that first outlay it drops sharply, because the bucket, blocks, and clamps are reusable and one kit dyes a whole stack of pieces. There is a shopping list with links inside the workshop.

Yes, with ordinary kitchen sense. A reduced indigo vat is alkaline, so you wear rubber gloves, keep it off your skin and out of your eyes, and mix the powder outdoors or by an open window so you are not breathing it in. No special safety equipment beyond gloves is needed. Set the bucket somewhere pets and grandchildren cannot knock it over, and cover it between dips. Module 1 walks through the setup.

You can watch the whole thing in an afternoon and finish your first piece the same day, usually inside three to four hours including the drying time between dips. The modules are short, and since access does not expire, most people work at their own pace and dye something new each weekend.

It is. You pay $47 once and that is the end of it. There is no subscription attached, nothing renews, and no upgrade is waiting on the far side of checkout. The workshop and all four bonuses are yours to keep.

Email us inside 30 days and we refund you within a day, without asking you to explain yourself or fill anything in. Keep the guides either way. My honest view is that the vat convinces people faster than any sales page can, so I would rather you go and try it.

For as long as you want it. The videos and every bonus stay in your account to rewatch whenever you like, and anything I add later shows up there at no extra charge. Plenty of people come back to the Pattern Vault a year in, looking for something new to fold.

Prerecorded video you can stream on a phone, tablet, or computer, with downloadable guides and shopping lists alongside. The videos are shot close-up and over the shoulder, so you can prop your phone against something near the bucket, pause, rewind, and work along in real time with wet hands.

Free videos hand you scattered pieces of the puzzle, which is why so many first attempts come out muddy and grey. Shibori is an order-of-operations craft: the fold decides the pattern, the vat decides the depth, and the wash decides whether any of it survives. This is that full sequence in one place, from a dead-simple vat to colorfast finished cloth, with the fix for each common mistake sitting where the mistake actually happens.

Checkout runs over an encrypted connection through the same payment processors you already use, Visa, Mastercard, and PayPal among them. Your card details are never seen or stored by us, and the 30-day guarantee sits on top of that.

Straight away. Access lands the moment your payment clears, so if you have a bag and a bucket in the house you could have cloth in the vat this evening.

One Bag, One Bucket, One Saturday

Gloved hands holding up a finished indigo tote patterned with concentric white rings, fresh from the vat

Nothing in this is hard. First bags come out grey because four things happened in the wrong order, and an order problem is a fixable problem. Get a plain bag, get a bucket, and go find out what your hands do with it.

My first decent one is still hanging by the back door, going soft at the handles.

Nora B.

One-Time Purchase. Lifetime Access.

$97 $47
Dye Your First Indigo Tote Now

Locks in the beta price while the first hundred places are open.

Secure Checkout All Cards Accepted 30-Day Money Back